Medical components should never move directly from production or clinical handling into final packaging without controlled cleaning and inspection procedures, because even small amounts of particulate residue, retained moisture, machining oils, detergent films, or biological contamination may compromise sterilization effectiveness, packaging integrity, or overall device performance.
In regulated medical manufacturing, cleanliness is not determined by visual appearance alone. A molded medical part may appear clean while still carrying ionic residue inside recessed features, trapped moisture within threaded geometries, or microscopic particles introduced during trimming, assembly, or handling operations. Once contamination becomes sealed inside medical packaging, the risk becomes significantly more difficult to detect and correct.
Biofilm formation is another major concern during medical device handling and reprocessing. Microorganisms protected inside biofilms become substantially more resistant to antimicrobial treatment and sterilization processes, which is why cleaning is widely considered the foundational step before sterilization and packaging can occur successfully.
For medical manufacturers, the objective is not simply to “wash” a component. The goal is to establish a repeatable contamination-control process supported by documented inspection standards, validated cleaning parameters, and traceable production records.
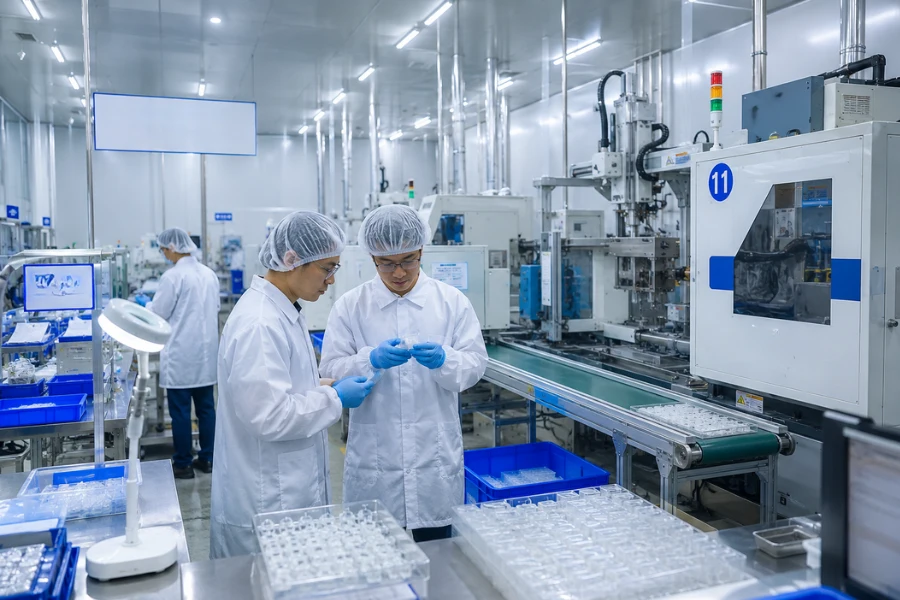
At SeaSkyMedical, cleaning preparation and packaging-readiness controls are commonly integrated into ISO-managed medical plastic injection molding workflows to support consistent quality for molded medical components, disposable consumables, and OEM medical assemblies manufactured in controlled environments.
Why Cleaning and Inspection Matter Before Packaging
Packaging protects a component’s condition after cleaning has already been completed. It does not remove contamination that remains on the surface or inside hidden features.
Medical parts may accumulate contamination during molding, machining, assembly, transportation, or clinical handling. Common contamination sources include airborne particles, trimming debris, lubricant residue, biological contaminants, detergent films, and moisture trapped inside lumens or blind holes.
In cleanroom injection molding environments, contamination control becomes especially important because molded edges, gate-trim areas, assembly interfaces, and static-prone plastic surfaces can retain microscopic particles that are difficult to detect without controlled inspection procedures.
Additional contamination risks may also be introduced during trimming, printing, bonding, or other secondary operation processes performed after molding.
The cleaning and inspection process must therefore account for:
| Risk Area | Typical Concern |
|---|---|
| Surface contamination | Oils, blood, detergent residue |
| Complex geometries | Blind holes, lumens, threaded areas |
| Molded plastic surfaces | Static-attracted particles |
| Moisture retention | Packaging and sterilization interference |
| Material compatibility | Chemical or thermal damage |
| Packaging seal areas | Burrs or particles affecting seal integrity |
Point-of-Use Cleaning and Initial Contamination Control
For reusable medical instruments and certain medical assemblies, contamination control often begins immediately after the procedure or manufacturing operation in order to prevent biological residue and debris from drying onto surfaces.
Visible contamination such as blood, tissue, bone fragments, lubricant residue, or processing debris is commonly removed using sterile water-moistened wipes, gauze, or sponges while the device remains at the point of use. Components containing lumens or internal channels are periodically flushed with sterile or distilled water to reduce the risk of trapped residue inside narrow passages.
Complex assemblies produced through medical device assembly operations often require additional inspection attention around mating surfaces, internal channels, and multi-material interfaces.
Complex assemblies and multi-part devices are usually disassembled before transport so that hidden surfaces can later be accessed during cleaning and inspection. Hinges, threaded areas, recessed molded features, and cannulated sections require particular attention because dried contamination becomes substantially harder to remove after prolonged exposure.
To reduce drying risks before decontamination begins, surfactant-based sprays or enzymatic pre-treatment solutions are often applied to maintain surface moisture during temporary holding periods. Contact time remains important because insufficient exposure may reduce the effectiveness of the chemistry.
Single-use items are separated from reusable components during this stage, while contaminated sharps are placed into designated disposal containers to minimize handling risks.
Transporting Contaminated Medical Components
After initial containment, medical components must be transported in a manner that minimizes both physical damage and cross-contamination.
Precision molded parts, reusable instruments, endoscope-related assemblies, and delicate medical devices are commonly secured inside protective trays, puncture-resistant containers, or dedicated transport systems designed to stabilize the load during movement. Heavier components are generally positioned below lighter assemblies to reduce mechanical damage.
Transport timing also affects cleaning effectiveness. Even when pre-treatment sprays are applied, contaminated devices should not remain exposed for extended periods because residue may still dry inside recessed areas, threads, lumens, or mating surfaces.
In controlled medical manufacturing environments, transfer procedures frequently include:
- closed transport containers
- dedicated transfer carts
- contamination-controlled movement paths
- scheduled cleaning of transport equipment
- separation between clean and contaminated handling areas
These measures help reduce recontamination risks before the actual cleaning cycle begins.
Manual Cleaning Methods for Medical Components
Three-Sink Cleaning Process
Manual cleaning remains important for fragile devices, precision medical assemblies, sensitive molded plastic components, and products that cannot tolerate aggressive mechanical washing conditions.
Operators typically wear full personal protective equipment including gloves, masks, eye protection, gowns, and protective footwear during manual cleaning procedures.
The three-sink process is widely recognized as a standard manual cleaning approach:
| Sink Stage | Function |
|---|---|
| First sink | Washing with detergent solution |
| Second sink | Intermediate rinsing |
| Third sink | Final rinsing with DI, distilled, or RO water |
Long-handled soft brushes and specialized lumen-cleaning tools are commonly used to access narrow passages while minimizing surface damage.
Disassembled components are cleaned individually so that internal cavities, threaded sections, and mating surfaces remain fully exposed during washing and rinsing operations.

Detergent and Material Compatibility
Cleaning chemistry selection depends heavily on material behavior and contamination type.
Enzymatic detergents are often selected when organic contamination is present because they operate effectively under relatively moderate conditions, while alkaline detergents are more suitable for aggressive residue removal associated with certain reusable medical devices.
Material compatibility remains critical because some coatings, adhesives, and engineering plastics may degrade when exposed to incompatible chemistry or elevated temperatures.
This is especially important for medical insert molding projects because aggressive chemistry or excessive thermal exposure may affect bonding integrity and dimensional stability.
Flexible materials used in TPU injection molding applications may also require lower-temperature cleaning and drying conditions to avoid deformation or surface damage.
This evaluation is particularly important for medical injection molding projects involving:
- polycarbonate
- polypropylene
- ABS
- PEEK
- silicone overmolded assemblies
- insert-molded medical components
Aggressive cleaning chemistry or excessive thermal exposure may affect bonding integrity, dimensional stability, or cosmetic surface quality in multi-material medical assemblies.
Mechanical Cleaning Systems
Automated washing systems are widely used because they improve process consistency while reducing direct operator exposure during decontamination.
Mechanical cleaning equipment typically combines controlled detergent injection, elevated temperature, pressure-driven circulation, and multiple rinse stages within a validated cycle that may last approximately 45 minutes depending on load configuration and component complexity.
Components are loaded onto dedicated racks that allow cleaning solution and rinse water to contact all exposed surfaces evenly. Improper loading can create shadowed areas where contamination remains trapped during processing.
Automated systems support:
- repeatable cleaning parameters
- documented cycle control
- reduced operator variability
- lower sharps exposure risk
- improved traceability
However, not all devices are suitable for mechanical washing. Flexible assemblies, delicate plastic components, coated surfaces, and electronic subassemblies may require supplemental manual cleaning procedures according to the manufacturer’s instructions for use.

Ultrasonic Cleaning for Complex Geometries
How Ultrasonic Cleaning Works
Ultrasonic cleaning systems use high-frequency sound waves to generate cavitation bubbles inside a liquid cleaning medium. As these microscopic bubbles collapse, they create localized agitation capable of removing contamination from difficult-to-access surfaces.
This process is especially effective for:
- blind holes
- threaded sections
- lumens
- hinges
- fenestrations
- intricate molded features
- 3D-printed geometries
Components produced through micro injection molding may require additional inspection attention because miniature geometries can trap residue inside extremely small features.
Frequency, exposure time, chemistry concentration, and operating temperature all influence cleaning effectiveness and must be controlled carefully to avoid damaging sensitive materials.
IPA, Ethanol, and Detergent-Based Systems
Isopropyl alcohol is frequently selected when fast drying and minimal residue are required. In many medical cleaning applications, 70 percent IPA provides stronger disinfection performance than higher concentrations because the water content improves penetration before evaporation occurs.
Ethanol may be preferable for certain coatings or plastics that are sensitive to IPA exposure, although slower evaporation rates increase drying considerations.
Ultrasonic systems may also operate with alkaline or enzymatic detergents depending on the contamination profile and device material compatibility.
Because alcohol-based chemistries are flammable, ultrasonic systems using IPA or ethanol generally require explosion-protected equipment and carefully controlled operating conditions.
Ultrasonic cleaning should not be applied indiscriminately to assembled electronics, fragile subcomponents, or materials that may be damaged by cavitation energy or elevated processing temperatures.
Choosing the Right Cleaning Process for Different Medical Components
Different contamination profiles require different cleaning technologies.
Water-based systems are commonly used for particulate removal and water-soluble contaminants, while modified alcohol and hydrocarbon solvent systems may be selected for oil removal and wax-like residues that are difficult to eliminate through aqueous processing alone.
Vapor degreasing systems are often applied when low-residue cleaning is required for precision medical components with tight dimensional tolerances.
In medical molding environments, cleaning process selection must also consider downstream packaging and sterilization requirements. Some medical plastic parts require low-particulate handling after cleaning, while others may require compatibility with terminal sterilization or aseptic assembly workflows.
At SeaSkyMedical, cleaning process development for molded medical components is typically aligned with material compatibility, geometry complexity, packaging requirements, and controlled manufacturing conditions in order to support repeatable production quality.
Rinsing and Drying Before Inspection
Final Rinsing Requirements
Rinsing quality directly affects cleanliness validation and packaging readiness.
Final rinsing stages commonly use deionized or reverse-osmosis water because untreated tap water may leave behind minerals, conductive ions, or residue capable of contributing to corrosion, spotting, coating interference, or sterilization complications.
Multi-stage rinsing systems are often used to progressively reduce detergent residue and ionic contamination levels.
Special attention is required for components containing:
- lumens
- capillary features
- deep recesses
- threaded geometries
- narrow internal pathways
These areas can retain both cleaning chemistry and rinse water if flow paths are not properly controlled.
Drying and Moisture Removal
Drying is not simply a finishing operation. Residual moisture may interfere with sterile barrier packaging, compromise coatings, and reduce sterilization effectiveness.
Different drying approaches are selected according to geometry and material characteristics:
| Drying Method | Typical Use |
|---|---|
| Hot air impingement | Open external surfaces |
| Vacuum drying | Lumens, capillaries, threaded areas |
| Convection or IR drying | Dense component loads |
| Ambient air drying | Controlled low-risk applications |
Sensitive plastics and coated surfaces may require lower-temperature drying conditions to avoid thermal distortion or surface damage.
When forced-air systems are used, airflow cleanliness must also be controlled carefully because contaminated air can reintroduce particles after cleaning has already been completed.
What Inspectors Look for Before Packaging Approval
Visual and Functional Inspection
Before release into packaging, medical components undergo inspection procedures intended to verify cleanliness, integrity, and functional condition.
Visual inspection is commonly performed under magnification or directed lighting to identify visible residue, particles, staining, scratches, corrosion, cracks, or coating defects.
Additional inspection activities may include:
- swab testing of hidden surfaces
- lumen inspection using borescopes
- alignment verification
- hinge and locking-function checks
- assembly verification for removable components
For molded medical plastic parts, inspection may also include evaluation for:
- black specks
- flash residue
- gate vestige defects
- particulate inclusions
- cosmetic surface damage
- seal-surface contamination
In medical injection molding environments, particulate inspection before packaging is especially important because trimmed gate areas, molded edges, and assembly interfaces may retain microscopic debris introduced during production handling.
Advanced Cleanliness Verification
Higher-risk devices and validated cleaning programs may require analytical testing beyond visual inspection.
Common verification methods include:
| Test Type | Purpose |
|---|---|
| Particulate testing | Evaluates particle quantity and size |
| NVR testing | Measures non-volatile residue mass |
| Ionic contamination testing | Detects conductive residue |
| Surface energy testing | Verifies coating or bonding readiness |
| Bioburden testing | Measures microbial contamination |
| Endotoxin testing | Evaluates pyrogen-related contamination |
Acceptance criteria, sampling frequency, and verification methods are typically defined within validation protocols and controlled quality documentation.
Components that fail inspection are either re-cleaned, quarantined, or rejected according to established quality procedures.
Packaging Medical Components After Cleaning
Packaging Preparation Requirements
Medical components should only enter packaging after cleaning, rinsing, drying, and inspection activities have been completed successfully.
Hinged instruments are commonly placed in the open position during packaging preparation, while removable assemblies are generally disassembled unless the manufacturer specifies otherwise.
Heavy components are positioned below lighter assemblies to reduce handling damage, and concave surfaces are often oriented downward to minimize retained moisture.
Packaging requirements may vary depending on whether the component will undergo terminal sterilization, aseptic assembly, or non-sterile medical distribution.
Packaging Material Selection
Common packaging systems include:
- peel pouches
- medical paper bags
- blue wrap systems
- rigid sterile containers
- specialty barrier systems
Packaging materials must allow sterilant penetration while remaining compatible with the selected sterilization method, including steam, ethylene oxide, or hydrogen peroxide plasma systems.
Durability, puncture resistance, and regulatory compliance also remain important during packaging selection.
Packaging materials and sealing methods should also align with validated medical device packaging requirements to maintain product cleanliness and sterile barrier integrity.
Peel Pouch and Tray Packaging Practices
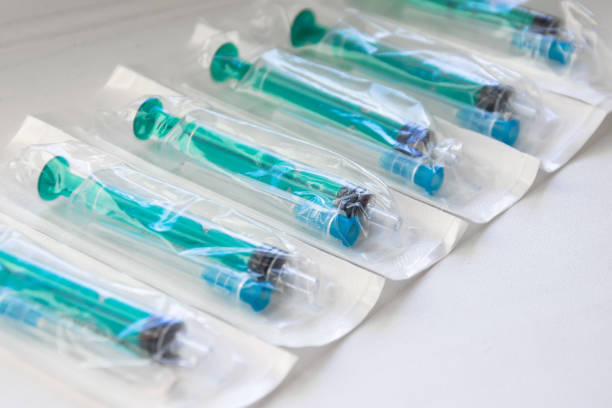
Peel pouches are generally used for lightweight medical assemblies and smaller components.
Instruments should remain in a single layer inside the pouch, while total loading volume typically stays below approximately 75 percent of pouch capacity in order to support sterilant penetration and sealing performance.
Rigid trays and wrapped instrument systems help reduce direct handling while maintaining organization and sterility during storage and transport.
Double wrapping may be applied for higher-risk surgical applications, and wrapping techniques should avoid gaps, tenting, or loose folds that could compromise sterile barrier integrity.
Following packaging, components are commonly labeled with identification information such as device name, lot number, sterilization indicators, and expiration data when applicable.
Validation, Documentation, and Change Control
Cleaning procedures used in regulated medical manufacturing environments must be repeatable, validated, and traceable.
Validation activities commonly focus on worst-case components representing the most difficult cleaning conditions based on geometry complexity, internal surface area, contamination risk, or material behavior.
Processing parameters established during validation directly affect production throughput because validated batch quantities and exposure conditions generally cannot be exceeded without additional verification work.
Documentation may include:
- cleaning chemistry lot numbers
- temperature settings
- exposure times
- rinse parameters
- equipment identification
- inspection records
- operator identification
- deviation reports
For OEM medical components, traceability requirements often extend from raw material certification through molding, cleaning, inspection, assembly, and final packaging documentation.
Cleaning validation considerations are often introduced early during product development to reduce downstream manufacturing and packaging risks.
When cleaning chemistry, fixtures, equipment, or process parameters change, manufacturers typically perform formal risk assessments and determine whether partial or full revalidation is required before production release.
FAQ
Q1. Is 70 percent IPA better than 99 percent IPA for cleaning medical components?
In many disinfection applications, 70 percent IPA provides stronger performance because the water content slows evaporation and improves penetration into microbial structures. Higher concentrations evaporate more quickly and may reduce effective contact time.
Q2. Can ultrasonic cleaning damage plastic or coated medical parts?
Yes. Certain plastics, coatings, adhesives, and delicate subassemblies may be sensitive to cavitation energy, elevated temperature, or incompatible chemistry. Material compatibility should always be evaluated before ultrasonic processing begins.
Q3. Why is DI or RO water used for final rinsing?
Deionized and reverse-osmosis water reduce ionic residue and mineral contamination that may contribute to corrosion, spotting, coating interference, or sterilization complications after drying and packaging.
Q4. What is NVR testing in medical component cleaning?
NVR stands for non-volatile residue. The test measures residual oils, waxes, or films remaining on a surface after cleaning. Excessive NVR may interfere with bonding, coating adhesion, or sterilization performance.
Q5. How are lumen components inspected after cleaning?
Lumen devices are commonly flushed with cleaning solution and rinse water before inspection using borescopes, inspection probes, or flow verification methods to confirm that no blockage or trapped contamination remains inside internal passages.
Q6. Why is moisture removal important before packaging?
Residual moisture may interfere with sterile barrier integrity, promote corrosion, compromise coatings, or affect downstream sterilization performance. Drying verification is therefore considered a critical part of packaging preparation.
Q7. Why is particulate inspection important before packaging medical plastic parts?
Microscopic particles from trimming, assembly, handling, or static attraction may remain on molded plastic surfaces even after cleaning. If these particles enter sealed packaging, they may affect product cleanliness, sterilization, or downstream medical assembly performance.
Q8. How is the worst-case component selected during cleaning validation?
Manufacturers generally select the component with the most challenging geometry, deepest recesses, largest surface area, or highest contamination risk because successful validation under worst-case conditions can help support broader process coverage for similar products.