Overmolding is a step-by-step injection process used to make both simple and complex designs on molded plastic products. These designs could either be for product modification or just to create more utility for the target audience.
Today, most plastic products have gone through the overmolding process because brands and injection molding companies try as much as possible to give their products an outstanding look in a highly competitive market.
This article contains plastic overmolding design guidelines that will help you learn how overmolding works and several design considerations that will make your product stand out in terms of look and quality.
What is Overmolding
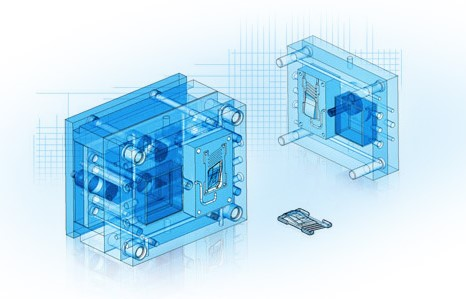
Overmolding, also known as two-shot molding is an injection process whereby certain rubber or plastic material (overmold) is injected onto the surface of an initially molded base component (substrates) to create a single solid piece.
The overmolding process requires two different steps to get the best result. Overmolding is done to give products a non-slip, grip, and soft feel feature to increase user satisfaction and also to give products unique designs. To manufacturers, overmolding certainly provides a reliable form of adhesion between different materials which saves them the cost and stress of having to assemble it by hand.
Selecting the most suitable material for overmolding can be a little complicated at times. This is because the resin used to create the substrate material may sometimes not be compatible with the overmold resin. Therefore it is advisable to seek assistance from professional overmolding factories for proper results.
Why You Should Use Overmolding Design
There are a whole lot of reasons why overmolding design is preferred. In terms of adhesion, product modifications and user utility, overmolding is your best bet. Below is an easy breakdown.
- Adds grip to substrate: Products that are mostly used in wet situations will need extra grip for them not to easily slip away while using. The best way to create grip for products like these is to add rubber-like resins to the handles, and the perfect means to get it done is through overmolding. Examples of products that need extra grip include; medical injection molding parts, electrical molded parts, auto molding parts e.t.c.
- Serves as insulator: Overmolding designs can serve as a proper insulator against heat, vibration, and electricity. There are different types of resin and each of them performs insulating functions in respect to heat and vibration. As for electricity, all forms of resin remain a non-conductor and will perform the job accurately.
- For sealing: Using the overmold technique for sealing products will give it a longer lifespan and make it permanently resistant to water and other human and natural damages.
- Provides adhesion: In the manufacturing industry specifically, adhesion is a quality most producers need. When a product needs extra surface attachment for enhancement, the most suitable method to adopt is overmolding. It keeps the substrate and overmold firmly attached to each other, increasing its ability to resist wear and tear and other forms of natural damage.
Advantages and Disadvantages of Overmolding Design
The next series of paragraphs discusses the advantages and disadvantages of overmolding design.
Advantages
- It increases comfort derived from an already made product.
- Overmolding can be used to create a single part from the combination of multiple materials.
- Helps brands and manufacturers to add extra design features that will make their product easy to recognize.
- The overmolding process is cost-effective with respect to having to pay for products to get assembled over and over again.
- Overmolding provides adhesion strong enough to increase product lifespan and utility.
Disadvantages
- The initial cost of mold production and factory equipment is quite high.
- Designing, testing, and manufacturing the most suitable mold for your product concept would take a lot of time.
- Resin selection requires a high amount of expertise on the path of manufacturers.
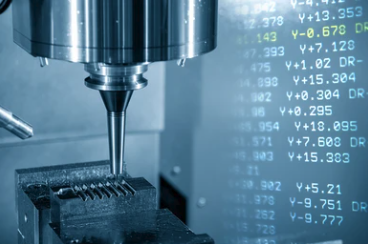
How Does Overmolding Work
The overmolding process starts from designing the mold of the material that is meant to be produced. Depending on how complex the designs are, this stage could require much more time and expertise. Also, it is the most crucial stage as it is the main factor that determines how the product will turn out. Therefore, the task should be assigned to professional injection molding companies.
When the mold is manufactured, another thing to put in place is the type of plastic material. There are several types of materials and each of them have different areas of use. Materials used on car bumper is entirely different from the one used in molding a bike handle.
Another thing to consider is the mode of production. Will it be manual or automated? When the amount of parts to be produced exceeds 10,000 units, the automatic method is the best. Although, it requires a large amount of capital to set up; it is necessary. When all these are put in place, overmolding can commence by following the steps below.
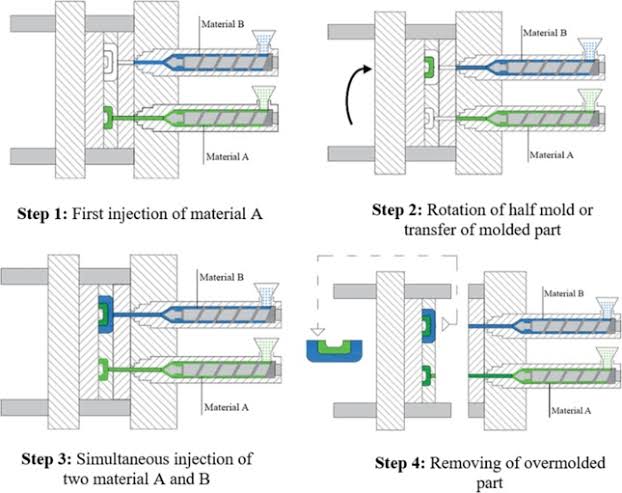
- A two-shot injection mold is needed. This machine is designed to accommodate two or more molds, and it is divided into Barrel A and B. Barrel A holds the substrate resin, while barrel B holds the overmold resin.
- The plastic material required is heated until it becomes vicious. Then it is injected into the barrel A of the mold to form the substrate material.
- When the substrate material becomes cool, the mold opens up without ejecting the substrate.
- The barrel B which contains the overmold resin then rotates 180° to inject the resin on the selected part of the substrate.
- If the overmold is to be printed on both sides of the substrate, the machine will have to switch the material between barrel A and B.
Vital Considerations For Overmolding Design
Apart from the mold design and material, there are other factors to consider to get the overmold of your choice. Here are a few.
Bonding
One important feature of a successful overmold is bonding. This feature ensures that the substrate and overmold are properly attached to form a strong and long lasting product. In order to get a proper bond, the period between the injection of the substrate and the overmold must be as short as possible. However, the substrate must attain a certain solid state for it to withstand the injection pressure from the overmold for proper bonding.
Basically, there are two types of bonding and they are known as vhemical bonding and mechanical bonding. Chemical bonding is a type of bonding that takes place at the molecular level. And it is influenced by the wetness; overmold temperature and viscosity; substrate texture and porosity. While mechanical bonding is a type that depends on the interface’s physical geometry.
A good bond strength can also be achieved with the use of higher than the normal melt temperature (400-460°F). When one of the overmold materials used is an elastomer, bond strength becomes more important as they can be easily flexed and wear away from the substrate. Below is a list of factors that influence adhesion (bonding).
- Substrates with a higher surface polymer tend to bond better.
- Ensure there is enough vent on the mold.
- Pre-drying of the overmold resin before application.
- Adoption of mechanical interlocks in the mold design.
- Thickness level must be appropriate to avoid delamination.
Overmolding Material Compatibility
- Thickness Effects: Thickness plays a vital role in the overmolding process. In order to achieve an overmold with a soft feel, the thickness level must be greater than 0.040° level. The thinner the overmold resin, the harder it becomes. The best way to solve the issue is to adopt the application of multiple ribs closely attached to create a type of thickness. This will help reduce the amount of material in a way.
- Hardness vs Modulus: There are several types of plastic material and a few people believe that the flexibility of a material determines its durometer or hardness. This is not always true. The best means of measuring flexibility and resistance to bending is by applying the Flexural Modulus. Therefore, a high amount of flexural modulus will bring about a stiff and unyielding product.
- Coefficient of friction: Friction occurs when two surfaces are dragged directly against each other, while the coefficient of friction is the degree of force that is required to move one surface against each other. This friction could be static or kinetic. In a situation where two or more types of material is required, customizing the coefficient of friction between them will bring about a more durable material.
Principles
- The surface of the proposed overmold part must be equal or a little below the adjacent substrate surface.
- The melting temperature of the substrate material must be higher than that of the overmold material.
- The overmold thickness must be lower than or at par with the thickness of the substrate below.
- Adhesion of the substrate and overmold should be carried out through the use of mechanical interlocks at every possible opportunity.
- For a great amount of adhesion, it is best to texture the substrate workpiece. While texturing the overmold part will provide more grip.
Design Considerations Before Overmolding
When it comes to overmolding, most of the complex and tedious jobs are done before the actual process kicks off. After getting the perfect design the whole production process becomes easier. There are two major types of designs that must be considered. They are; Part Design and Mold Design.
Part Design
Part design refers to the amount and manner of components meant to be administered to get the right substrate and overmold materials to serve various purposes. After deciding the type of part to be produced, the next thing is to understand the core functions of this part; the type of environment, temperature and conditions they will be exposed to; and the required long-term production needs.
General Concepts
Below is an overmold design guide to help produce quality parts.
- To attain a favorable molding cycle time, the substrate and overmold wall thickness must be as equal as possible. A wall thickness of about 1.5mm-3mm is advisable for better results.
- Flow problems such as back fills and gas traps can be reduced when the transition between the wall thickness is gradual.
- Deep ribs or un-ventable blind pockets need to be avoided for better outcomes.
- Using a minimum of 0.5mm radii in sharp corners will help reduce localized stress.
- If the intended part requires the use of thick resins, they should be cored out to minimize shrinkage and also reduce the part’s weight cycle time.
Flow Length and Wall Thickness
The wall thickness around the intended part must be even to facilitate an equal resin flow. The thick areas should be avoided to prevent shrink marks and voids. The resin flow characteristics and the conditions used in the overmolding process are the two major factors that affect the maximum attainable flow length.
Quantifying the material flow characteristics can be done with the use of a spiral flow test. This spiral flow test will give producers a factual analysis of the material’s ability to fill a part. Materials with higher bond strength require shorter flow lengths and vice versa.
Shrinkage and Warpage
Most resins and TPEs (Thermoplastic Elastomers) have various shrinkage characteristics due to their chemical formation. The shrinkage of a part or material is mainly dependent on the type of TPE in use, the mold design, and the condition under which the part was molded.
Warpage does occur when the overmolding component contracts more than the substrate after the part has been ejected from the mold. In most cases, it is as a result of having the overmolding material in the flow direction. Also, when there is lack of pressure or the mold and melt temperature becomes too high or too cold, shrinkage and warpage are bound to occur.
To avoid this, it is advisable to use a high-modulus substrate component, including stiffening ribs to the substrate part and minimize the thickness of soft TPE.
Shut-off Design
The sole purpose of shut-off designs is to minimize TPE flashing and to reduce the chance of peeling.To reduce the chances of TPE flashing, the substrate should possess a 0.38mm-0.76mm deep groove along the edge of the TPE overmold. And also, spring should be provided underneath the steel section when metal or non-compressible substrates are used.
Below are a few tips on how to reduce the chance of overmold peeling.
- The non-overmold section of the substrate should flush with the surface of the TPE.
- The non-overmold section of the substrate should be on a higher level than the edge of the TPE.
- The edge of the TPE must not be even with the edge of the part.
Mechanical Interlocks Design
Mechanical Interlocks is a form of design adopted in overmolding to increase the attachment of the substrate in parts that are prone to abrasion or maximum stress. It can as well be used to create higher surface area to improve product performance.
Part Function & Scenario
The main purpose of overmolding is to create and enhance material parts. These parts are applied in several places to serve various purposes. Below is a list of functions and scenarios of an overmolded part.
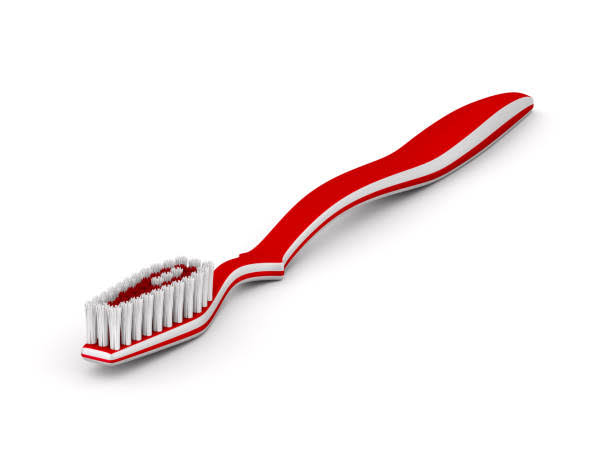
1. To provide grip
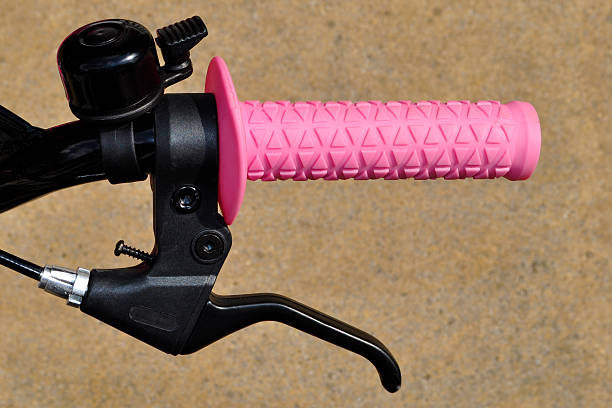
Grip is a type of function that is essentially required by materials being used in wet or sweaty situations. When a grip overmold is attached to the handle of a bike, it helps the rider have a tight hold of the handles even when their palms become sweaty. Other materials that require grip include; garden hose, drills, toothbrush e.t.c.
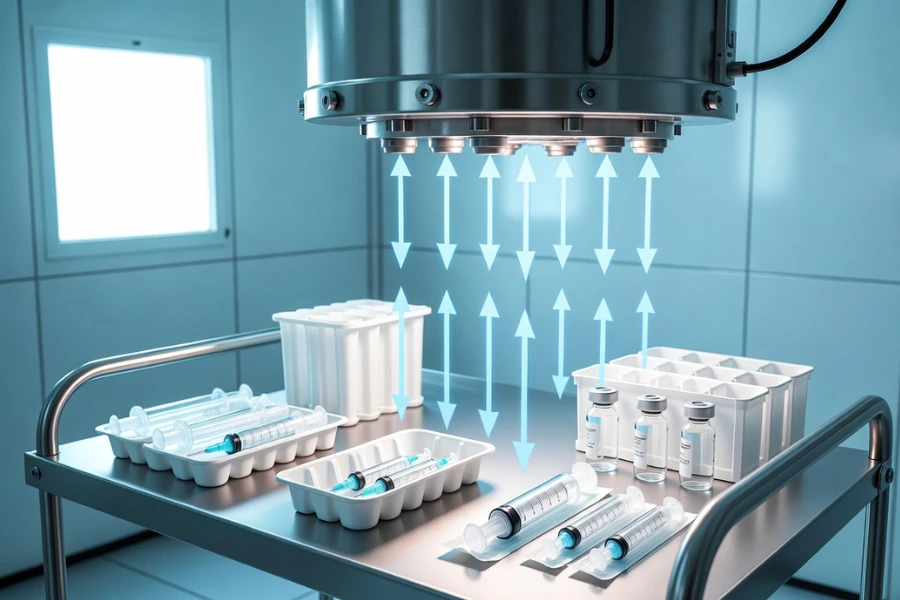
2. To serve as seals
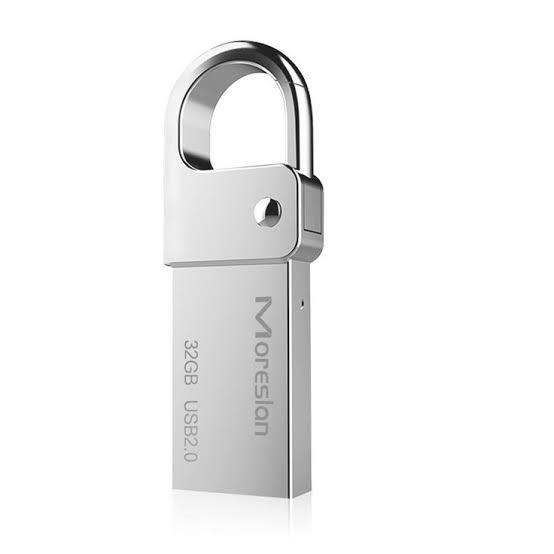
Alt Text: Overmolded Waterproof Flash Drive
A lot of materials being produced today require an adequate amount of sealing. Creating an overmold for this purpose will require much time and expertise because it is relied on for the safety of the substrate. Seals perform water resistance functions on electronics and other devices. An example is the resin overmold on flash drives.
3. To serve as shock absorbers and vibration isolators
Delicate consumer products can be isolated from shock and vibration by building a suspension or mounting system around them. The thickness should appear more on the edges and smaller side, while it should be lesser on the flat surface. Also, the weight, and durability of the product, as well as the severity of drops will determine the appropriate overmold design. Car components such as fenders, hood, door frames e.t.c are built to absorb shock for user safety.
Mold Design
An overmold design must be created for every single product manufactured through the overmolding process regardless of their similarity. The way a mold is built will determine the outcome of the product. A mold is made of steel and the quality and quantity of the intended part will determine the type of steel to be used. If the substrate material is reinforced, high abrasion resistant steel will be required.
Below are a few tips to consider for a proper mold design.
- Gates should be sited where the TPE wall section is thickest.
- Adequate cooling in the TPE cavity to minimize cycle time.
- A proper component ejection from the tool must be devised to avoid many marks on soft resins.
- The flow ratio must not exceed 150: IL/T at maximum.
Overmolding Design: Processing Considerations
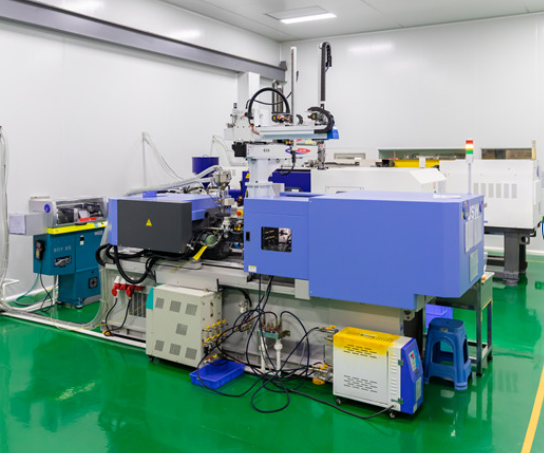
- Machine Selection
The best molding machines are the ones with conventional reciprocating screws. Nevertheless, the latest molding machines that are controlled digitally can handle critical molding parameters. They are more suitable to handle multi cavity tools and large production quantities.
For more effective temperature control, it’s best to get a machine that uses 25% – 75% capacity of the barrel shot size. And for start-ups, choosing a machine with smaller nozzle diameter will help produce heating during injection.
- Material Handling and Preparation
To prepare materials for the overmolding process, they should go through the stages summarized below.
- Purging
Before restarting production, purging must be done if the press has been down for about 10 minutes. The machine must be restarted using a reduced shot, with gradual increase into the previous setting to prevent flashing.
- Coloring
Care should be taken during the selection of color concentrates because the color masterbatch must be compatible with the selected grade overmold. Polypropylene (PP) and Thermoplastic Polyurethane (TPU) are the most recommended color concentrates because they are compatible with most commercial resins. Adhesion can be severely affected if the carrier is incompatible with the chemistry of the applied resin.
- Regrind
For insert molding, regrind can be very useful when good quality TPE scrap is formed during the process. Bright coloured or natural products may be contaminated during the regrinding process except it is carried out in a clean and controlled manner. Only TPE with black color is capable of tolerating the regrinding process.
- Drying
Drying is essential for a few overmolding materials. This can be done with the use of vacuum dryers and a moisture level of below 0.1% is recommended. To get a reliable level of adhesion, the substrate and overmold moisture level must be controlled, and drying time should be around 3 hrs at 130-150°F.
- Cooling Time
There is no definite cooling time. It all depends on the quantity/type of cooling available, the part’s wall thickness, and the temperature of the melt. Hard TPE grades are bound to form faster than soft grades. But average, overmold cooling time should be around 35-40 seconds for a 0.100 inches of wall thickness.
Seaskymedical Overmolding Services
Seaskymedical stands out as one of the best plastic injection molding manufactures and medical component manufacturers. We major in the production and supply of diverse plastic injection molded parts capable of satisfying various needs.
Our advanced injection molding technology is capable of tackling both simple and complex injection molding designs of your choice. We are well aware that our products hold a crucial role in the health and safety of our customers, therefore we adopt the use of the ISO 8 cleanroom injection molding for safe and quality assurance.
Conclusion
Overmolding has been able to help manufacturers tackle a lot of daily issues their customers face while using their products. From complex design upgrades, to safety issues, and down to maximizing utility. Thanks to the constant research, manufacturers can now take on custom plastic injection moldingtasks on behalf of individuals and suppliers.
With this overmolding design guide, individuals, operators, and manufacturers should gain some essential basic knowledge required before embarking on plastic overmolding design and production. For more overmolding services, feel free to contact us.